Bluestacks has no doubt become the most popular android emulator. Bluestacks is one of the many Android Emulators that first appeared and works without bugs. And here we will discuss how to root BlueStacks 4 and BlueStacks 3. Rooting can give full access and be able to install some cool applications that should require root permission to use.
There are several online Android Emulators that you can try, but they are not very effective or easy to use when compared to the offline Android Emulator. BlueStacks is an Offline Android Emulator, which means that it can be used without requiring an Internet connection for the application to run. But you need an internet connection if you want to download the application on Google Play Store and browse through Bluestacks.
Google Play Store by default is already available on Bluestacks for use. You can also easily install the apk file that you have provided to install on BlueStacks. Bluestacks can also play intensive games like PUBG Mobile, Asphalt and CSR Racing 2 and many other games.
How to Root BlueStacks easily
If you don’t already have Bluestacks on your PC, you can download it on the website from Bluestacks. Or you can download it by clicking the following link below:
The tool needed to Bluestacks is called BlueStacks Tweaker. You need to download this tool first. BlueStacks Tweaker is a very effective tool and can be used how to root bluestacks and many features in it. There are options to configure Bluestacks installation and also improve Bluestacks performance.
- Link to Download: BlueStacks Tweaker
- Link Post: Forum XDA
Read Also: How To Root Oppo N3 Without PC [100% WORK]
How to Root BlueStacks 3 and 3N
BlueStacks 3 and BlueStacks 3N are the most stable versions at the moment. BlueStacks 3N uses Android Nougat (7.1) while BlueStacks 3 uses Android Kitkat (4.4).
Steps for Root Blustacks 3 and 3N
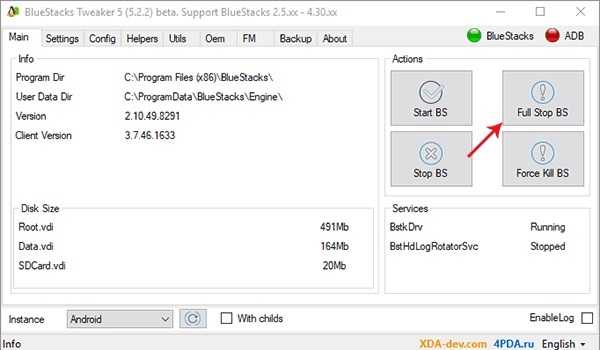

Step 1 : First, open BlueStacks Tweaker.
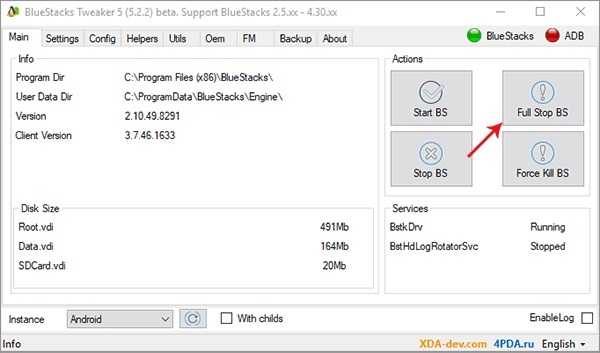
Step 2 : Click on the Full Stop BS button to stop BlueStacks and all its activities.
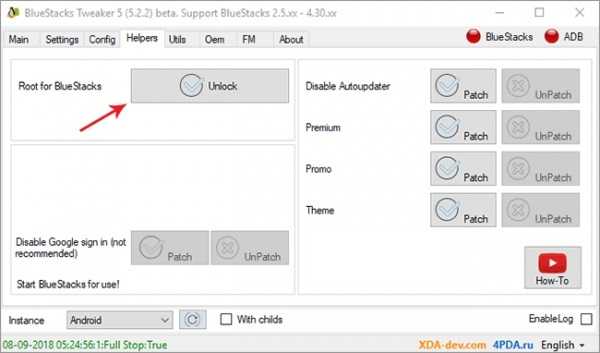
Step 3 : After BlueStacks and ADB status are red, open the Helpers tab and then click the Unlock button next to the words Root BlueStacks.
Step 4 : After unlocking is complete, Open BlueStacks by clicking the Start BS Button from the Main tab. Once loaded, Click on the Patch button then patching will run and finish then the status message shows “RootPatch: True” at the bottom.
Step 5 : Click the Install SuperSu button. SuperSu is an application used to manage root privileges that will later be on Bluestacks.
Step 6: Check BlueStacks and open the SuperSu application. If a command appears to install Su Binary. Click Continue and Select Normal. After the installation is complete, click Ok.
Step 7 : To determine whether the bluestacks root is successful, install the Root Checker application from the Google Play Store
How to Root BlueStacks 4 with Ease
BlueStacks 4 is currently in beta. Root Bluestack 4 can help you to run applications that need root and do other things. How to root Bluestacks actually is not much different from Root Bluestacks 3 above. But it will be explained again for how to root Bluestacks 4 below.
Steps for Root Blustacks 4

Step 1 : First, open the BlueStacks Tweaker application.
Step 2 : Click the Full Stop BS button to turn off BlueStacks and all its services.
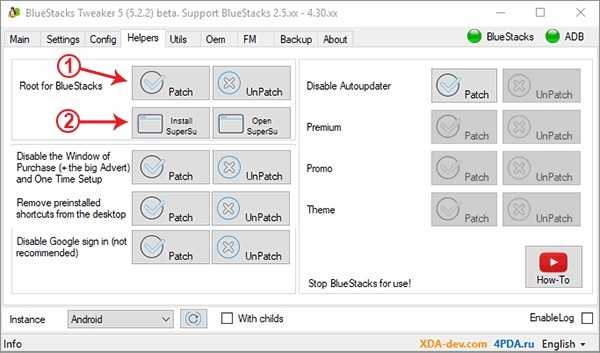
Step 3 : After that, open the Helpers tab then click the Unlock button next to the words Root for BlueStacks.
Step 4 : After unlocking is complete, Open BlueStacks by clicking the Start BS Button from the Main tab. Once loaded, Click on the Patch button then patching will run and finish then the status message shows “RootPatch: True” at the bottom.
Step 5 : Click the Install SuperSu button. SuperSu is an application used to manage root privileges that will later be on Bluestacks.
Step 6: Check BlueStacks and open the SuperSu application. If a command appears to install Su Binary. Click Continue and Select Normal. After the installation is complete, click Ok.
Step 7 : To determine whether the bluestacks root is successful, install the Root Checker application from the Google Play Store.
Also read: How To Root And Install TWRP Xiaomi MI Note 3
Congratulations! You have successfully root BlueStacks 4.
By doing How To root blustack, making Bluestacks can install and use applications that require root permission. You get more freedom using Bluestacks.