How to split the screen in Windows 10 – Windows has always been an excellent environment for multitasking and splitting the screen is something extremely simple that will help us to carry out all the work in a faster and more efficient way.
- How to fix Green Screen of Death on Windows 10/11?
- How to update Kodi on Windows 10 and 11
- How To Go Back to Windows 10 from Windows 11?
Use the instant assist feature
One of the best multitasking features is Snap Assist. The feature allows us to select an application window to arrange it on the screen alongside others, basically splitting the screen in Windows. We simply have to drag the app window to the edge or corner of the screen and it will automatically resize to fit.

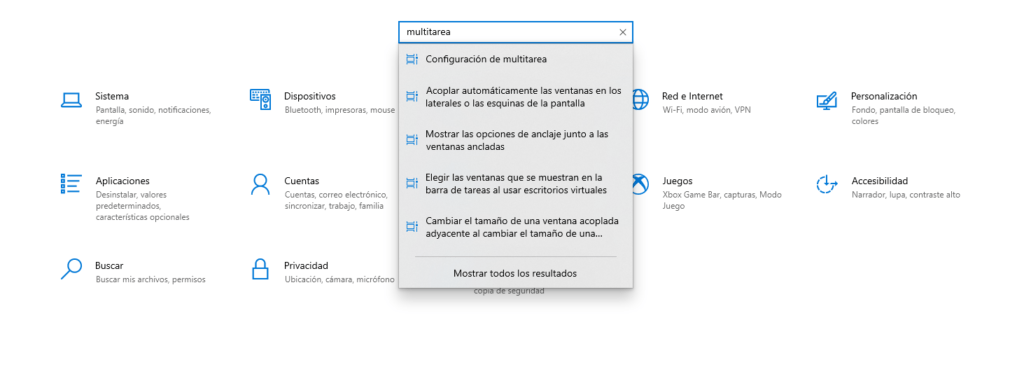
We will turn on the feature first, press Windows + i to open System Settings. We will write multitasking and select Multitasking settings.

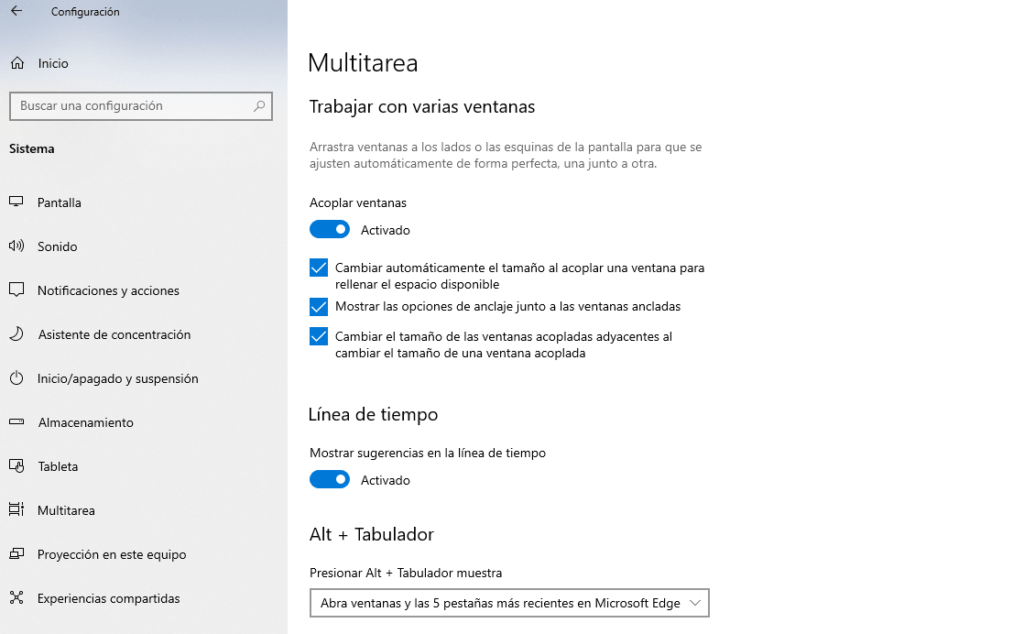
In this new window we are going to move the switch so that it is activated and we will have three options that we can also enable:
- When we adjust a window, it will automatically resize itself to fill the available space.
- By adjusting a window, Windows will allow us to see what other window we can place next to it.
- Resizing a fitted window will also resize a fitted window simultaneously with it.
How to split the screen Windows 10
There are a couple of ways to use this feature, but I want to share with you the simplest one which I personally use every day for work. It is something as simple as pressing “Alt + arrow”.
Let’s pretend that we have, on one side, an Excel window and on the other Chrome. How can we divide the screen so that an app is on each side? Simple, we open any of the two and press, for example “Alt + arrow to the left” and it will automatically fit to the left and Windows will suggest that we select another window to dock to the right.
In this simple way, we have already managed to divide the screen exactly to be able to work with both applications. As you can see, it is something too simple and fast, we can also put the apps horizontally, all with the arrows on the numeric keypad.
We hope that this article was useful to you, if you have any questions you can leave it in the comment box that you will find a little further down and we will be happy to help you solve it.