How To Root Samsung Galaxy S7 / S7 Edge [100% WORK]
Rooting on the Galaxy S7 or S7 Edge allowed for higher authority on your Android device, giving the user the ability to install specialized applications that require administrator-level permissions or modify system files freely. If you are interested in it, the below-detailed steps will guide you on how to root Samsung Galaxy S7 / S7 Edge with Oreo, Nougat, or Marshmallow.
Before you start root your Samsung Galaxy S7 / S7 Edge
Here are some things you should be aware of before taking the steps below:
- You will lose all your data and the warranty will become invalid after the device’s bootloader is unlocked. Make sure you make an updated backup before rooting.
- Samsung Pay will not be available after rooting.
- Do not flash custom ROMs or you may damage the device.
- A Windows computer is required.
Tip: If you haven’t backed up and lost all your root data, feel free to try Samsung data recovery to recover deleted messages, photos, videos, contact, and other data.
Read also: How to recover data from Samsung Galaxy.
If everything is ready, we just start the Samsung Galaxy S7 / S7 Edge rooting process.
Read Also: How To Install TWRP Samsung Galaxy S7 And S7 Edge
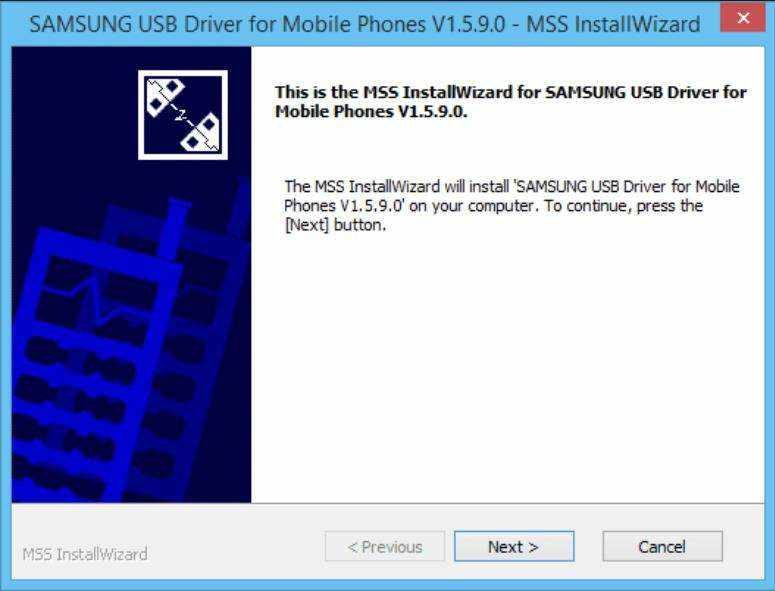
Step 1: Download Android USB Drivers
Go to Samsung Developers to purchase the Android USB driver for GS7 / GS7 Edge. Launch it after downloading and follow the instructions to get the driver installed on your computer.
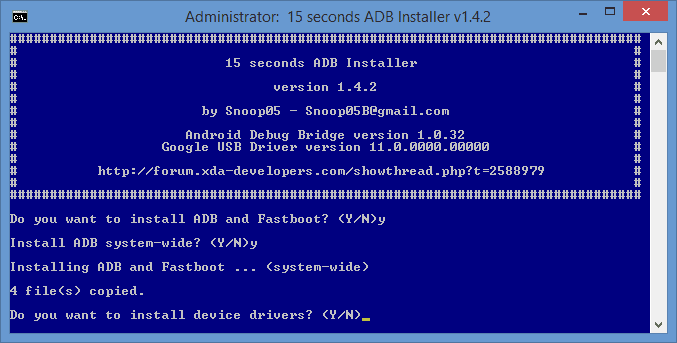
Step 2: Download and configure Android Debug Bridge (ADB)
Go to this page and download the 15 seconds ADBInstallation. Right-click the .exe file and select Run as administrator. When it launches, type y in each dialog. After that, restart your computer to make sure it is installed. Read Also: 4 Ways How to Root LG Stylo 4 Without PC [100% WORK].
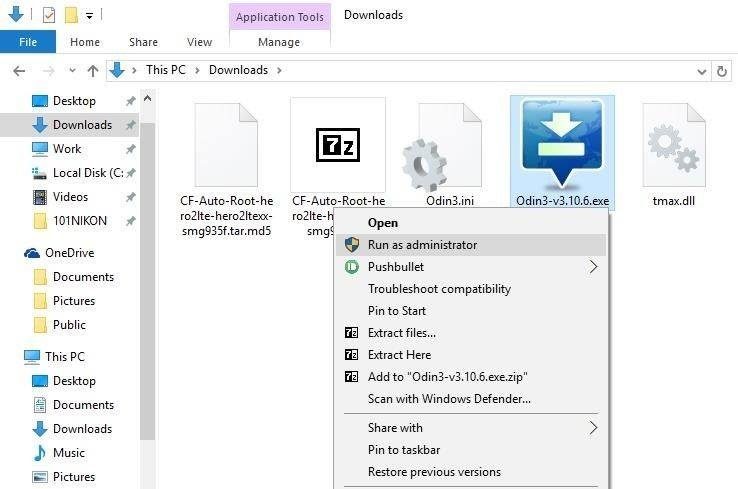
Step 3: Download Odin and the Root boot image
Click the link below to get a copy of AutoRoot Root containing Odin executable files and rooted boot image (ending with.tar.md5). Now run the EXE file as an administrator and install it on your desktop so that you can locate it quickly.
Step 4: Enable OEM unlocking and USB debugging
Let’s go back to the Galaxy S7 or S7 Edge and change some settings for a root.
- 1. Navigate to Settings> About phone and find the build number. Touch it several times until it tells you that you are a developer now.
- 2.Back back and select Developer Options, where you can enable OEM unlocking and USB debugging.
Step 5: Boot Galaxy S7 or S7 Edge in download mode
You should now turn off your Samsung device and press the power button, the volume down button, and the Home button at the same time to enter the download mode. Use the Volume Up button to confirm your decision. After that, connect your GS7 / GS7 Edge to your computer. Read Also: How To Root BlueStacks 4, 3, and 3N on Windows.

Step 6: Root your Samsung Galaxy S7 / S7 Edge
The last step is to click on the AP option on the main menu to import the .tar file I just downloaded. Wait a few seconds until you see a message saying “Leave CS” on the Log tab. After that, click the Start button to root your Samsung device.
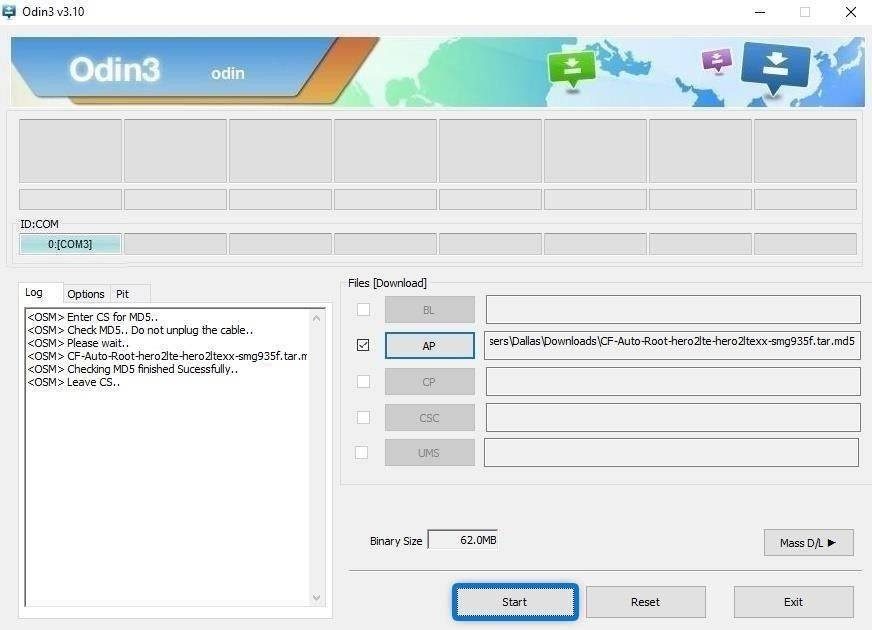
The root process will take place automatically. When done, the Galaxy S7 or S7 Edge will restart in Android. Keep in mind that your device may reboot a few times during the root Samsung Galaxy S7 process, which is normal.
Step 7: Check the condition of the root
To see if the device has been completely rooted, it is a good idea to download and run the Root Checker application to check the Superuser privilege. If you are asked “Congratulations! Root access is installed correctly on this device!” This means that you have done everything right.
Conclusion
It’s all you need How to root Samsung Galaxy S7 / S7 Edge on 8.0 Oreo, 7.0 Nougat, 6.0 Marshmallow, or lower. If you lost all your root data, try recovering your Samsung data to recover it.