How to create slicers in Microsoft Excel
How to create slicers in Microsoft Excel – Creating segmentations in Microsoft Excel is something very simple that will allow us to filter data and always see what is filtered in our spreadsheets.
We can even customize them and this is something that we will show you a little further down.
- How to Darker Grid Lines in Microsoft Excel
- How to use the STDEV (standard deviation) function in Excel
Create slicers in Excel
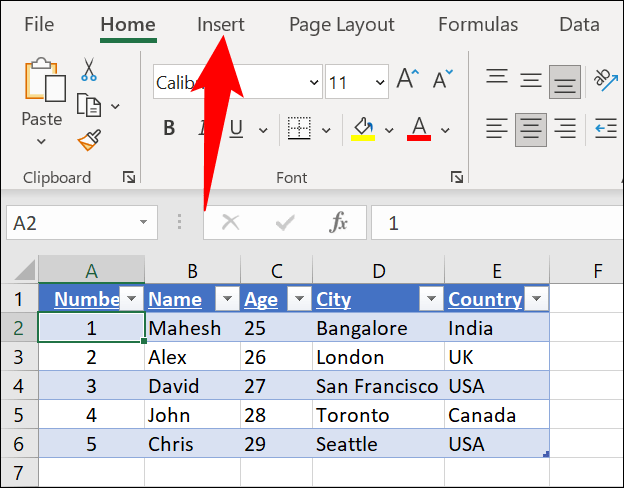
The first thing we will have to do is open our spreadsheet in Microsoft Excel. After this we will have to click on the table in which we want to filter the segmentation data.

With the table selected, we are going to have to go to the Excel ribbon at the top, we will click on the “Insert” tab.

Once we are in the insert tab, we are going to go to the “Filters” section and click on “Slicer” to add it.

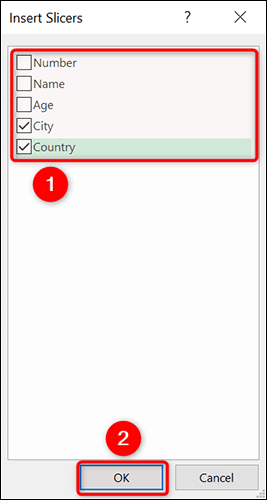
We will see an “Insert slicers” window that allows us to see the fields of our table. Here we are going to choose the fields that we want to filter with a segmentation, then we are going to click on “OK” at the top.

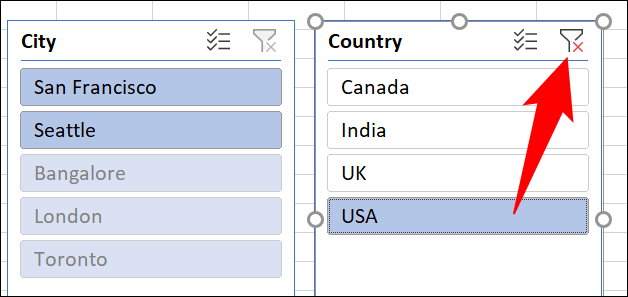
Excel will add a slicer for each selected field. To start filtering your data , we’ll need to select an option from one of these slicers and the data in the table will adjust accordingly.
If we want to apply multiple filters on a single slicer, we can use multiple options by holding down Ctrl on Windows or Command on Mac.

In order to establish a segmentation filter, in the upper right corner of this segmentation we will have to click on the “Clear filter” option.
Read Also: How To Remove Excel Table Without Losing Data
Customize a Slicer in Microsoft Excel
We can also customize them to use a specific color or size. Another thing we can do is drag and drop to position them where we want.
To be able to access the customization options of our segmentation. The first thing we will have to do is choose a segmentation of the spreadsheet. Then, in the ribbon at the top, we are going to click on “Slicer” to access all the customization options.

Here we are going to see many options to be able to customize the slicers of the spreadsheet. For example, if we want to change the color of the segmentation, we can choose a new color scheme in the “Segmentation styles” section.

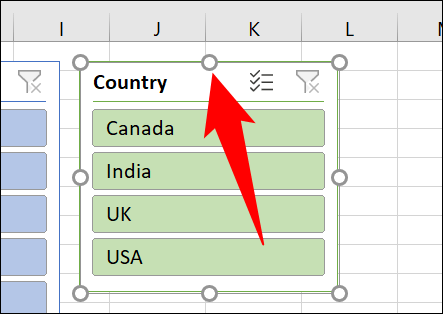
In the same way, we can change the size using the “Height” and “Width” boxes at the top. Another way we have to change the size of the segmentation is simply to click on it and drag the icons in the form of points.
After customizing everything, we’ll need to save the spreadsheet for the changes to be saved.